
Homemade Dutch Oven Crusty Bread
This post may contain affiliate links which won’t change your price but will share some commission.
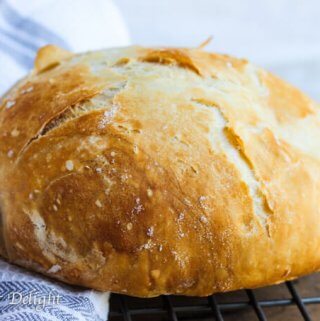
This Homemade Dutch Oven Crusty Bread tastes like the fresh bread straight from the best bakery. But it comes from your oven and it only takes 10 minutes of prep time. There is no kneading involved!

How Homemade Dutch Oven Crusty Bread was born in my kitchen
When I first moved to the US, I found it very difficult to find a good quality, freely baked bread. I went to the supermarket and everything I saw was in a plastic bag and tasted artificial. I was so disappointed. I missed my crusty, warm bread from the bakery around the corner, in my hometown in Poland. Even regular grocery stores had a good quality fresh, crusty bread.
Bread is the number one food item in Poland; everything is served with bread. We ate bread for breakfast, bread with soup then sandwiches for lunch and finally bread for dinner. My little cousin could eat half a loaf of bread by herself in one sitting (and she’s very skinny!).
Now you can understand my huge disappointment in the quality of bread found in a grocery store in the US. However, summer here was a bit easier. I found great local bread sellers in the farmer’s market, but the farmer’s markets would close in November. So, during the winters I had a huge shortage of my favorite thing to eat.
To weather the winter, I found that Trader Joe’s has a pretty good sourdough bread. But still, none of this is what I remembered from my childhood – the fresh, crusty, still warm bread from the local bakery. Can you imagine how excited I was when I learned that I actually can make this bread by myself, and it actually tasted exactly how I remember?
This is how ‘Homemade Dutch Oven Crusty Bread’ was born in my house.

How to make homemade bread in a dutch oven
Doesn’t it look amazing? I’m still so impressed with the quality of bread I was able to make. I hope you don’t mind that I’m sharing so many bread photos, but I had a really hard time narrowing down my selection of photos for this post.
I have to admit it though – it took a few tries to make this bread to actually get to this point, but I feel like I’ve mastered it now. And I’m going to share it with you, so you won’t have to go through a trial and error process.
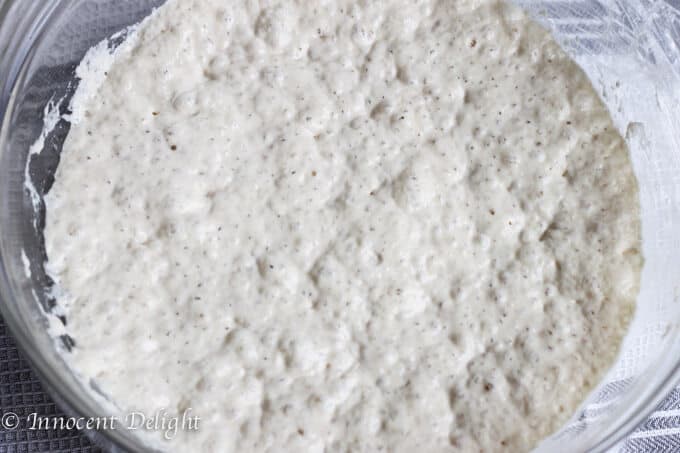
Preparation is super easy. You only need to combine flour, salt, and yeast, and then add room temperature water. Mix it together with a spatula. Cover and let it rest for 12-18 hours. The next day you’ll need to heat up a dutch oven and place the dough on the floured surface. Here, you’ll need to form a ball from the dough.
That’s actually the tricky part, and this is exactly where I failed a few times. I saw this recipe on Simply So Good and it wasn’t really explained how you form this ball. It just wasn’t working for me. I was also placing the dough in the dutch oven without parchment paper, and my bread just wasn’t rising high enough.
Don’t get me wrong, the bread came out delicious, but the shape just wasn’t there, it wasn’t high enough. I couldn’t figure out what I was doing wrong. I tried different flours, different yeasts and I was still ending up with the same imperfect product.
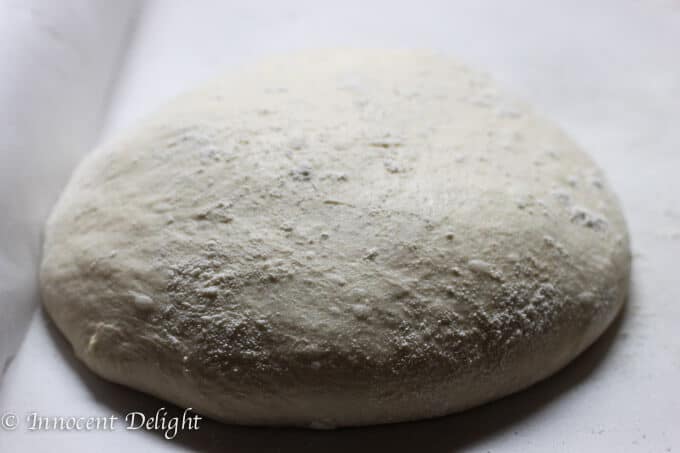

It wasn’t until I found out that the person who shared this recipe in a first place created a video with instructions on how to make this bread. It turned out that I did not use the right technic and tools to form the ball. So, once you pour your dough on the floured surface, use a vegetable scooper and fold the dough a few times.
Afterward, tuck it under with your hands to form the ball. Watch this video to see exactly how she does it. Needless to say, this time the bread came out beautifully. Round, high, crusty on the outside and soft on the inside. Pure perfection!
Memories of a crusty bread
This Homemade Dutch Oven Crusty Bread took me straight back to my childhood when my mom would send me to the bakery to pick up a loaf of bread. When I was approaching the bakery, the smell of the freshly baked bread was surrounding the whole neighborhood. I usually picked up one loaf and then would walk back home.
The walk took about 15 minutes, but before I got home I’d have eaten half the crust, leaving the inside untouched. This crust was just so addictive. Every time my mom would get angry at me, because she didn’t know what to do with half of the “naked” bread.
I always tried to convince her that it wasn’t my fault. Rather, because it was smelling so good, I just couldn’t stop myself. The only solution I proposed was that to avoid this, that maybe she just shouldn’t be sending me to the bakery next time. 🙂

What to serve this homemade dutch oven crusty bread with
You can use this bread for breakfast, lunch, and dinner. You can donk it in a sauce or make a sandwich. Here are a couple of suggestions that you can use it with:
For Breakfast:
For Lunch:
For Dinner:


Homemade Dutch Oven Crusty Bread
Ingredients
- 3 cups of all purpose flour (I use organic as I prefer to make organic bread)
- 1 1/2 teaspoons of salt
- 1/2 teaspoon of Instant yeast
- 1 1/2 cups of room temperature water
Instructions
- In a large bowl, mix together flour, salt, and yeast
- Add water and using spatula, mix together until combined
- Cover with plastic foil and let it rise for 12-18 hours
- After at least 12 hours, heat up the oven to 450F
- When the oven has reached this temperature, place covered empty dutch oven into the oven and let it heat for half an hour
- In the meantime, pour the dough onto a surface covered with flour
- Using a vegetable scooper, turn the dough few times and form a ball
- Place parchment paper onto your surface and then place your dough ball on top, cover with plastic foil and let it rest until the pot is hot
- After the pot has been in the oven for half an hour, take it out and place the bread with parchment paper inside, cover with lid and bake for half an hour
- After half an hour, take off the lid and bake for another 15-20 minutes
- Remove from the oven and let it rest before cutting
Nutrition
Read about the author Edyta here or follow Eating European on social media: Facebook, Instagram, Pinterest, and Twitter.


I love this recipe. I have been successfully experimenting with added ingredients as follows: sliced kalamata olives and tyme and oregano. Sliced green olives with rosemary and oregano. I plan on trying sundried tomatoes and really the possibilities are endless. This loaf is so good, easy and has a good outcome every time.
Just made this today, it turned out great and made great sandwiches!
Where is the video you were speaking of how to form the ball?
I have made this bread successfully many times. Today my bread was dark and tasted sour. What caused this?